How-To Guides
Electronics and AV Gear in Storage: Moisture, Cables, and the Photo-First Teardown
Key Takeaways
- LA storage threatens electronics with coastal humidity, Valley heat, and construction dust, each requiring different protection.
- Use silica gel desiccant at about 40 to 50 grams per cubic foot and monitor humidity with a cheap hygrometer.
- Climate-controlled units are worth the extra cost for AV gear stored longer than a couple of weeks in LA.
- The photo-first teardown means shooting wide shots, back panels, and port close-ups before unplugging anything.
- Label every cable, coil it with the over-under method, and store cables in their own bin away from heavy gear.
- Never lay a flat-screen TV flat, keep receiver vents clear, protect speaker cones, and remove batteries from remotes.
- Load electronics last, keep them off the truck floor, and avoid parked-truck heat on long freeway runs.
- Let gear reach room temperature before powering on to avoid condensation damage, then test one component at a time.
In This Article
A homeowner in Sherman Oaks stands in front of a wall-mounted TV, a receiver stacked with cables snaking behind it, and two floor speakers flanking the couch. The move is next week, and the whole home theater has to come down. That moment, when someone realizes they have no idea which cable went where, is where most electronics storage mistakes begin.
Electronics and AV gear are not like couches or boxes of dishes. They react to moisture, heat, and dust in ways that furniture never will. A humid storage unit can leave condensation on a circuit board. A tangled bin of cables can turn a two-hour reassembly into a weekend of guesswork.
Whether the gear is going into storage for a month or a year, these steps keep it working when it comes back out.
Why Electronics Need Special Care in Los Angeles Storage
Plenty of people assume any storage unit will do. Toss the gear inside, close the door, and forget about it. That works fine for a bookshelf. It does not work for a $2,000 receiver or an OLED panel.
The problem is climate. Electronics storage in Los Angeles fights three things at once: coastal humidity, valley heat, and construction dust. Each one attacks sensitive gear in a different way, and the local geography decides which threat is worst for a given unit.
| Threat | Where It Hits Hardest | What It Damages |
|---|---|---|
| Humidity / marine layer | Santa Monica, Venice, coastal westside | Circuit boards, connectors, speaker cones |
| Heat spikes | Van Nuys, Reseda, San Fernando Valley | Capacitors, batteries, adhesives |
| Dust and debris | Downtown LA, active development zones | Fans, vents, optical drives |
| Condensation | Any unit with big temperature swings | Internal components on cold gear |
The Coastal Marine Layer and Humidity Swings
Anyone who lives near the coast knows the morning fog. That marine layer rolls in overnight and burns off by midday, and it carries a lot of moisture with it. Storage spaces near Santa Monica and Venice sit right in its path.
Humidity creeps into units through door gaps, vents, and even the concrete floor. Over weeks, that damp air settles on metal contacts and inside gear. Speaker cones made of paper or cloth absorb it and can warp or grow mildew.
The tricky part is the swing. Humidity might hit 80 percent at dawn and drop to 40 percent by afternoon. That back-and-forth is harder on electronics than steady dampness because it drives condensation cycles. If you are storing gear on the westside near Santa Monica, humidity control should be the first thing on your list.
Heat Buildup in Valley Units
The San Fernando Valley plays by different rules. Summer afternoons near Van Nuys and Reseda regularly push past 100 degrees, and a metal storage unit acts like an oven. Inside temperatures can climb 20 or 30 degrees higher than the air outside.
That heat is rough on circuit boards. Capacitors dry out faster, adhesives soften, and rechargeable batteries degrade or swell. Gear that sat fine through a mild spring can take real heat damage during a July heat wave.
Plastic housings and cable jackets also suffer. They can become brittle or slightly deformed after months of baking. For Valley storage, a climate-controlled unit is worth the extra cost, especially for anything with a battery or a hard drive inside.
Dust and Debris From Nearby Construction
Los Angeles is always building something. Downtown LA has had cranes up for years, and new development kicks fine dust into the air across the whole basin. That dust does not stay outside.
It works into storage units through vents and seams, then settles on every surface. Electronics are especially vulnerable because they have fans and vents built to pull air in. Dust collects on heat sinks and fan blades, and it packs into optical drive slots.
Good dust protection means sealing gear before it goes in, not after. A receiver stored uncovered for six months near a construction zone can come out with a visible gray film in every vent. Covering and boxing gear keeps that debris off the parts that matter.
What Sets Electronics Apart From Regular Storage Items
A couch does not care if it gets cold and then warm again. Electronics do. When a cold device warms up quickly, moisture in the air condenses on the internal parts, and that condensation can short a board the moment power hits it.
Batteries add another layer of risk. Remotes, game controllers, and small devices left with batteries inside can leak corrosive fluid that ruins the contacts. Lithium cells can swell in heat, which is a safety issue, not just a repair issue.
Then there are the connectors. HDMI ports, speaker terminals, and fine internal ribbon cables bend and break far easier than most people expect. Fragile connectors need more thought than a couch cushion, and that is exactly why packing electronics deserves its own plan.
Get Your Free Quote
Tell us about your move and we'll get back to you fast.
Fighting Moisture Before It Ruins Your Gear
Moisture control is the single biggest factor in whether gear survives storage in good shape. The good news is that it is cheap and simple once someone knows what to do. The bad news is that most people skip it entirely.
Electronics storage done right combines prevention and monitoring. You block moisture from reaching the gear, and you watch the humidity so you know when to act. Here is how our team approaches both.
- Prevention: desiccants, proper wrapping, and the right kind of unit
- Monitoring: a hygrometer and reusable indicator cards you can check anytime
Desiccants, Silica Gel, and How Much You Actually Need
Silica gel is the workhorse of moisture control. Those little packets pull water out of the air inside a sealed box or case. The mistake most people make is using one tiny packet for a huge box and calling it done.
A useful rule of thumb is about one gram of silica gel per liter of enclosed space, or roughly 40 to 50 grams per cubic foot for damp coastal conditions. For a boxed receiver, that means a few larger desiccant packs, not one sandwich-size packet. For a full TV box, plan on several.
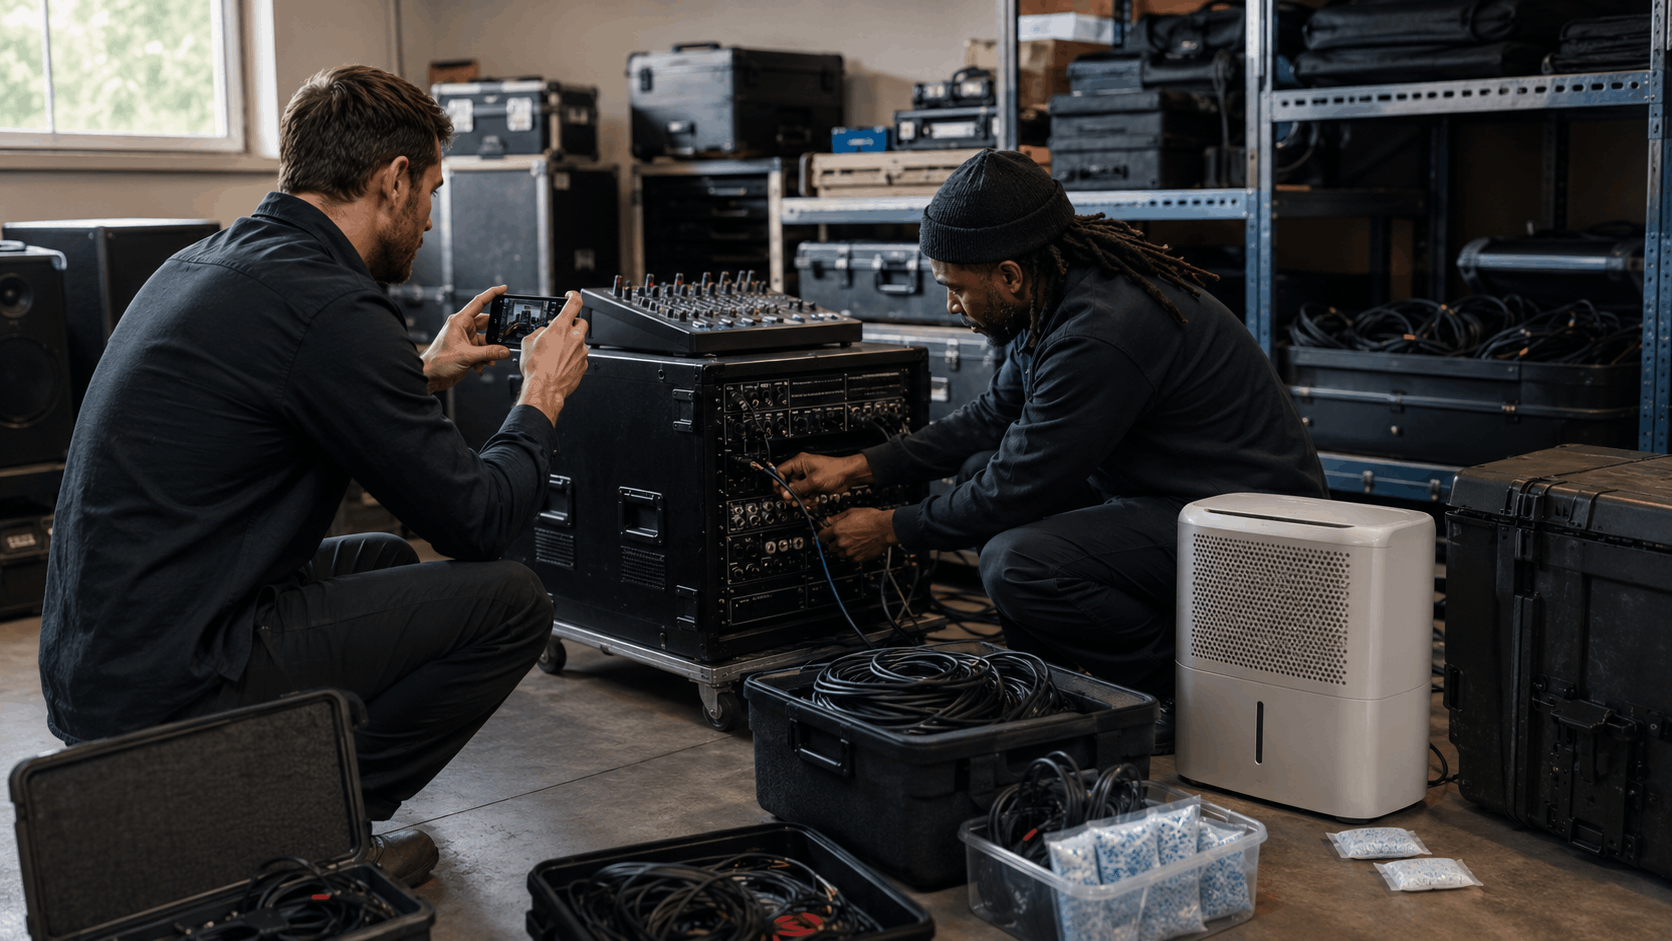
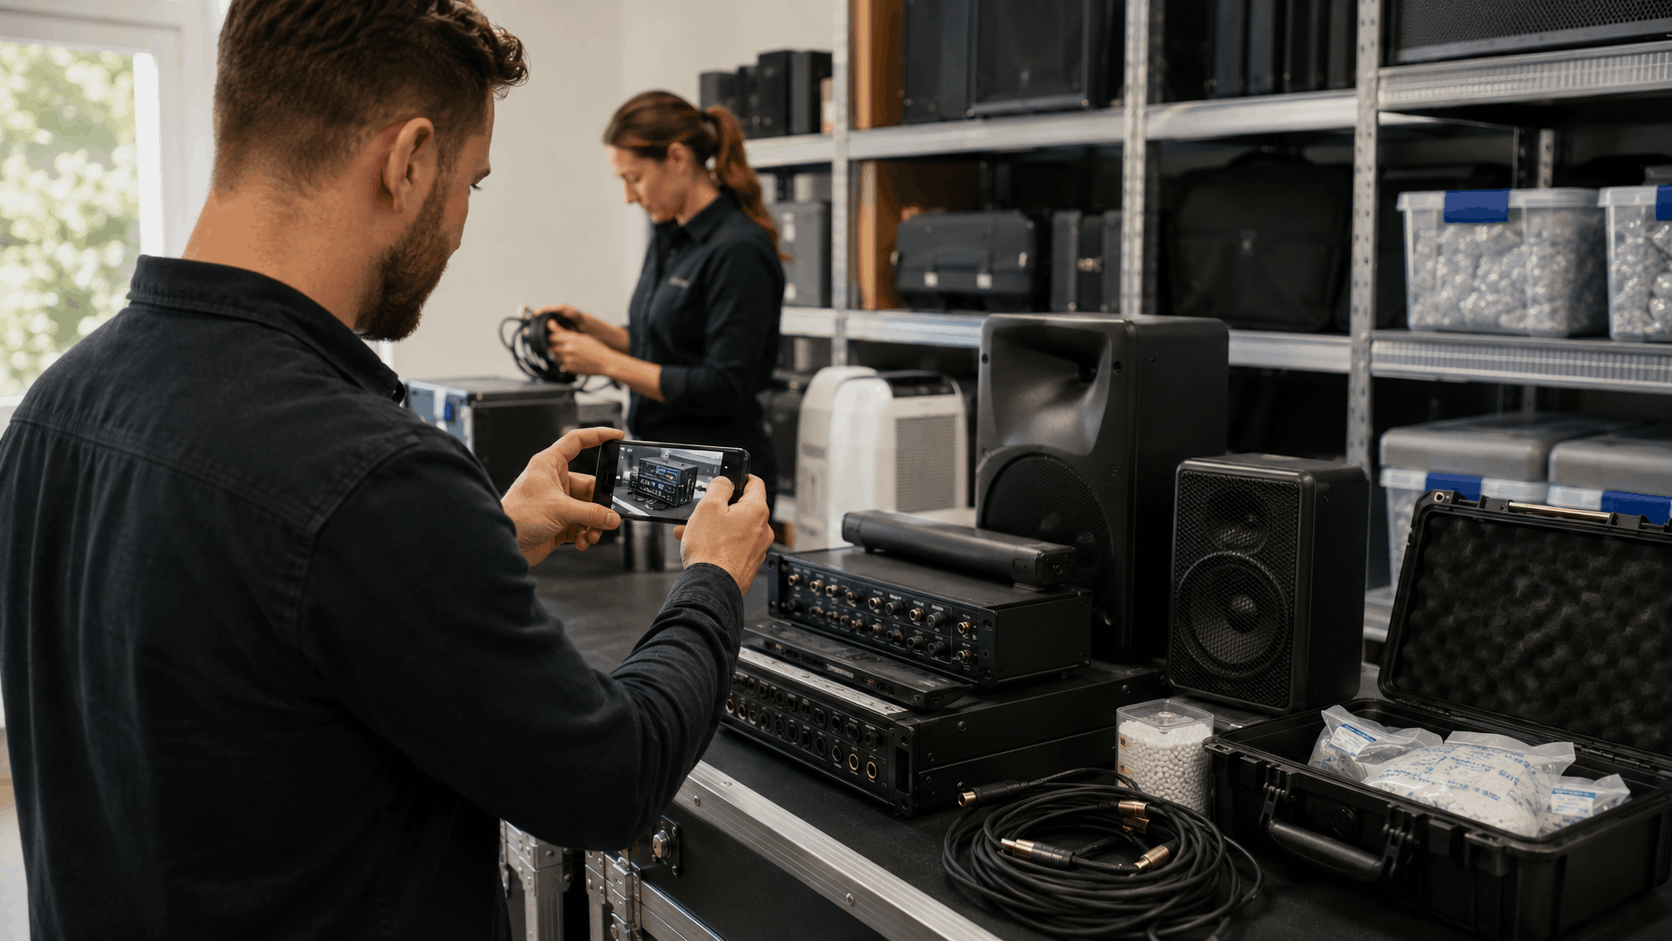
Placement matters too. Put desiccant packs near the openings and vents where moist air enters, and tuck a couple inside the gear's carrying case if it has one. Buy the rechargeable kind so you can dry them in a low oven and reuse them when they saturate.
Climate-Controlled Units vs. Standard Units
A climate-controlled storage unit holds temperature in a steady range, usually around 55 to 80 degrees, and keeps humidity in check, often near 30 to 50 percent. A standard unit does neither. It tracks whatever the outside air is doing, plus the extra heat from being a sealed metal box.
The cost difference is real. Climate-controlled space runs more per month, sometimes 25 to 50 percent higher. But for AV gear in Los Angeles, that difference is small next to the price of a ruined receiver or a warped speaker.
Standard units can work for very short stints in mild seasons, say a couple of weeks in spring. For anything longer, or anything through summer in the Valley, our long-term storage options with climate control protect the gear that matters. When in doubt, the electronics belong in the controlled unit.
Sealing and Wrapping Without Trapping Moisture
Wrapping gear the wrong way causes the exact damage it was meant to prevent. Plain plastic sheeting or a garbage bag traps whatever humid air is inside at sealing time. That air then condenses against the plastic every time the temperature drops.
Anti-static bags are the right choice for boards and small components because they protect against static without holding water against the surface. For larger items, a vapor barrier bag combined with fresh desiccant creates a low-humidity pocket that actually stays dry.
The order matters. Dry the gear, add desiccant, then seal in a vapor barrier. Never wrap warm, humid gear in tight plastic and shove it in a cold unit, because that is a recipe for condensation on every surface.
Simple Humidity Monitoring You Can Check Anytime
You cannot fix a moisture problem you cannot see. A cheap digital hygrometer, often under 15 dollars, tells the humidity inside a unit or even inside a large bin. Some models log the highs and lows so you can spot bad swings.
Reusable humidity indicator cards are another easy tool. They change color when the air passes a moisture threshold, so a quick glance tells you when the desiccant is spent. Drop one inside each sealed box near a viewing window if the box has one.
Check the readings whenever you visit the unit. If the humidity monitor climbs past 55 or 60 percent, it is time to swap or recharge the desiccant and check the seals. A five-minute habit keeps small problems from becoming expensive ones.
Need Help in Los Angeles?
Popeye Moving & Storage serves Los Angeles and all of Los Angeles County.
The Photo-First Teardown Method Explained
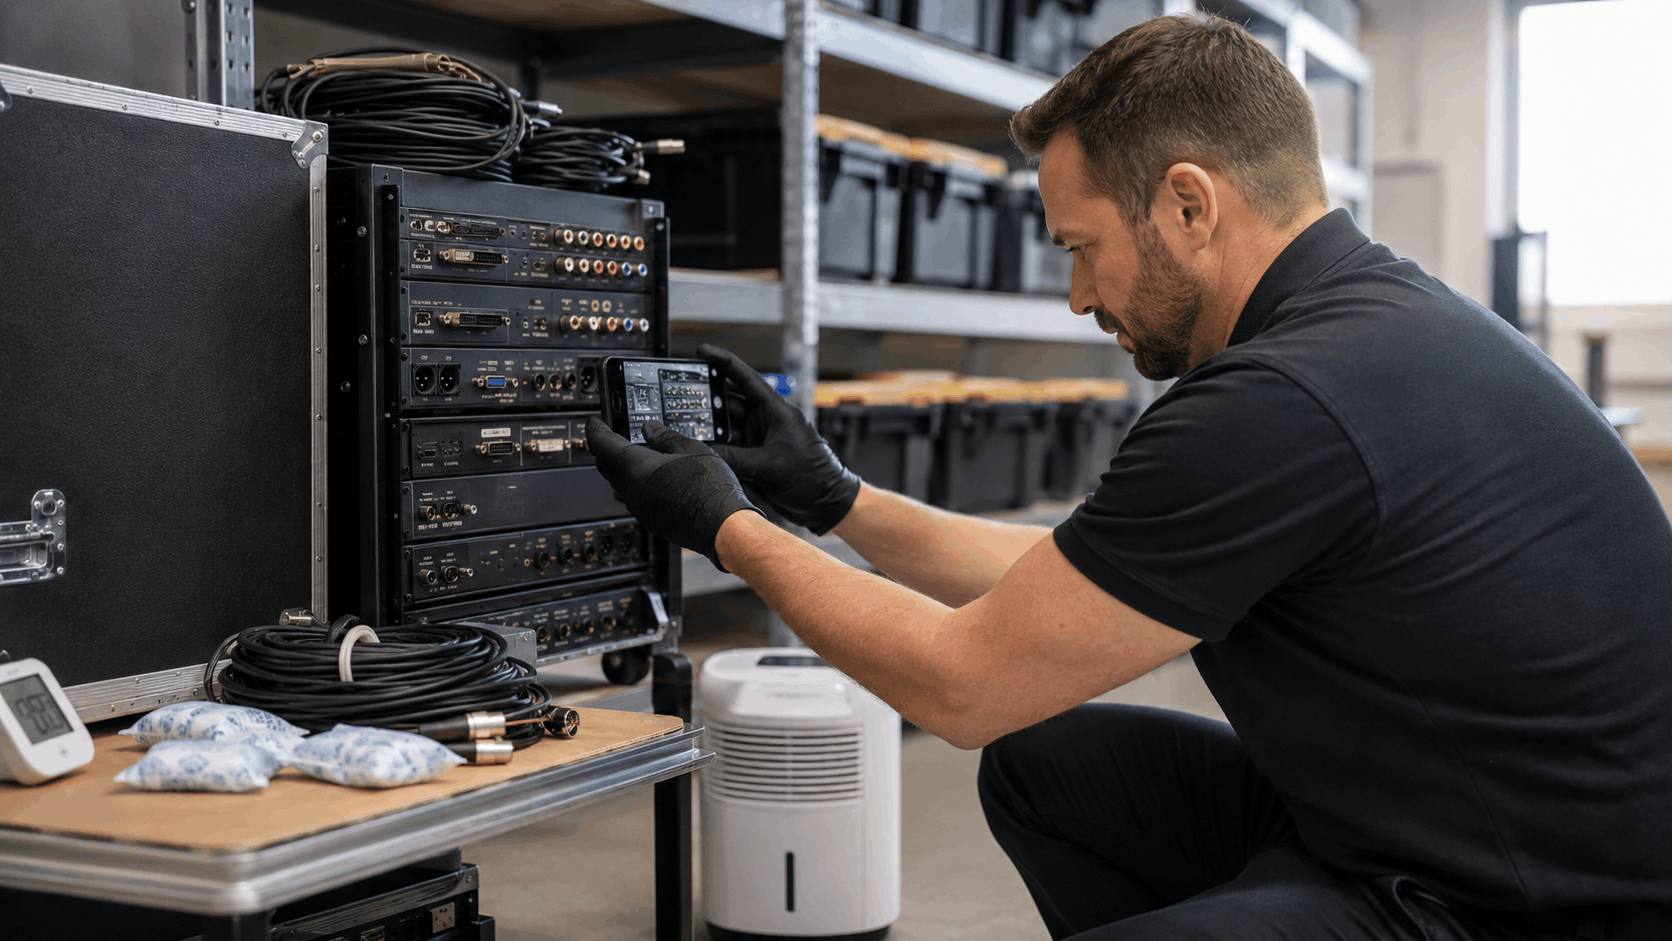
Here is the trick that saves the most headaches: photograph everything before you unplug anything. We call it the photo-first teardown, and it is the single best habit for anyone breaking down an AV setup.
The reason is simple. Months later, no one remembers which HDMI cable fed the cable box versus the game console, or which speaker wire was left versus right. A phone full of clear photos answers every one of those questions in seconds.
Shoot Every Angle Before You Touch a Cable
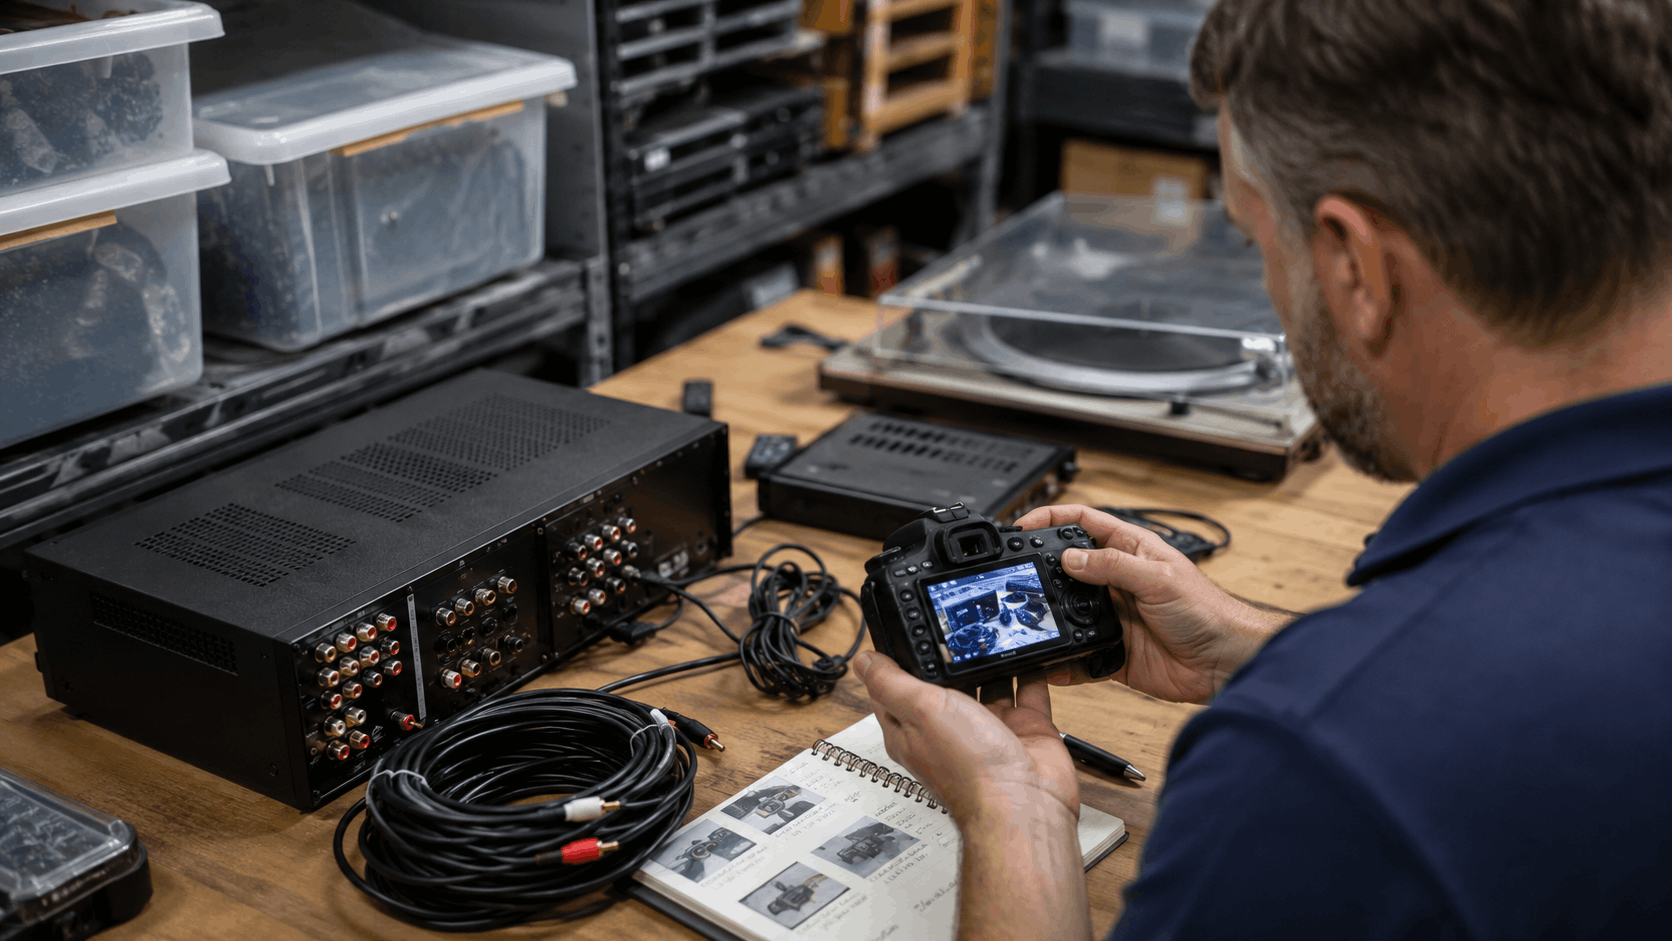
Start wide. Take a full-room shot of the whole setup as it sits, then work in closer. Capture the front of every component so you know the stack order and which device is which.
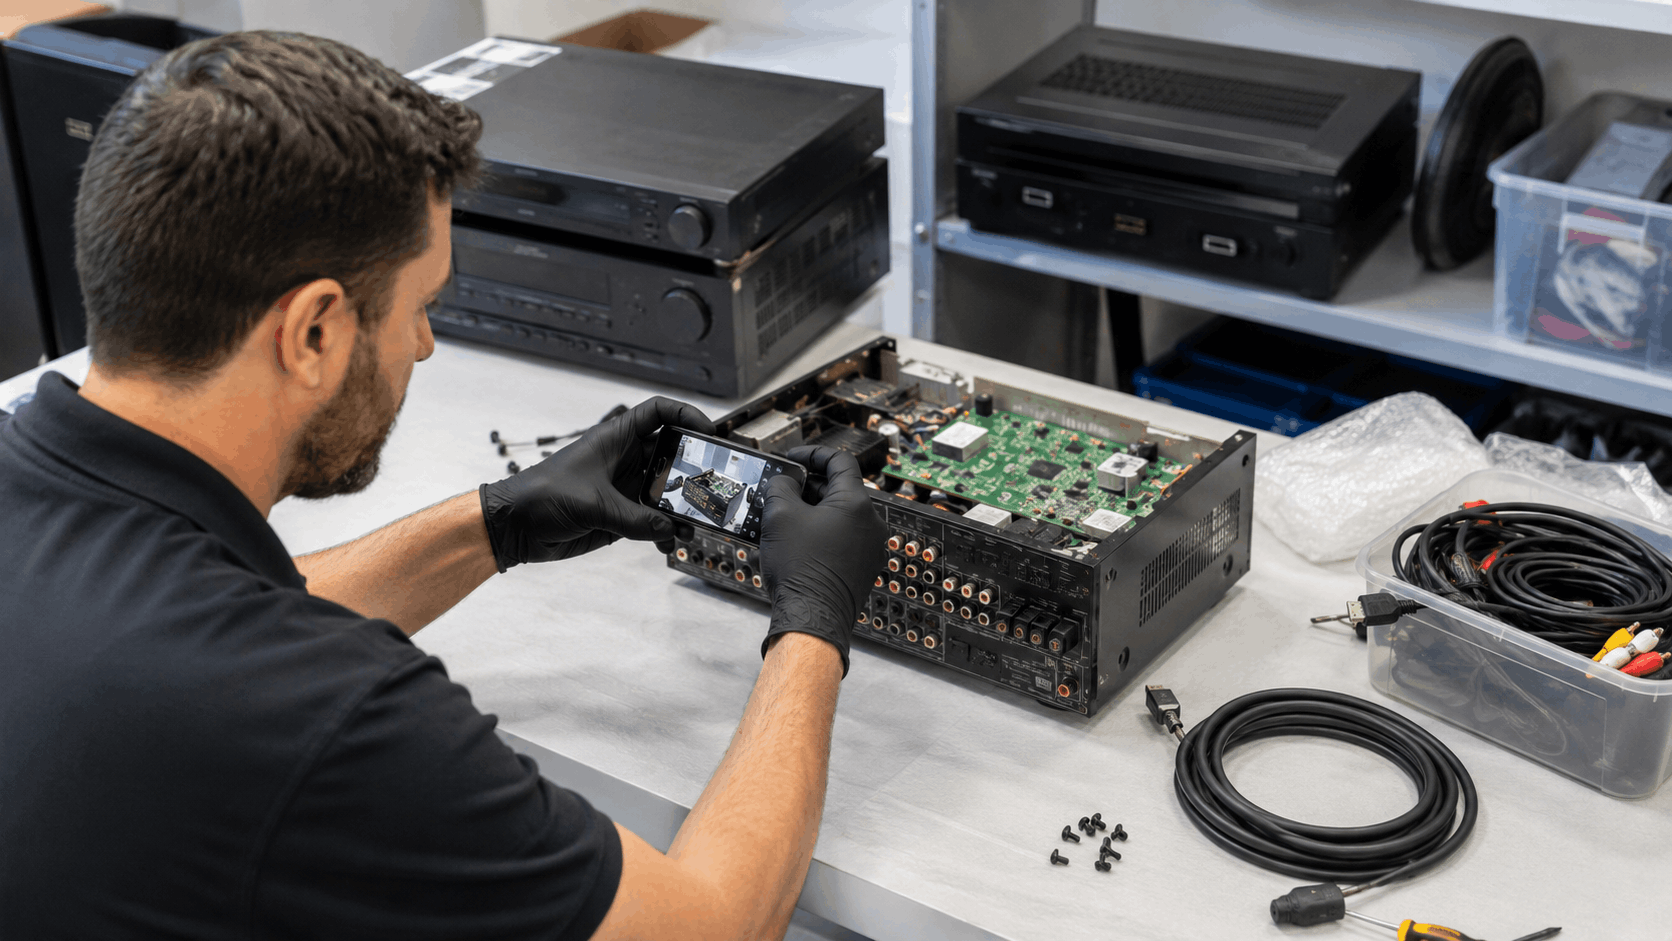
Then get behind the gear. Photograph the back panel of the TV, the receiver, and every box in the rack with all the cables still connected. These cable photos are the roadmap you will follow during reassembly.
Do not rush this part. A thorough teardown record might be 20 or 30 photos, and that is fine. Every angle you skip now is a puzzle you create for your future self.
Close-Ups of Every Port and Connection
Wide shots show the general layout, but close-ups win the details. Get macro shots of the HDMI ports so the labels next to each jack are readable. HDMI 1, HDMI 2, and ARC all matter when a device only works on one specific input.
Do the same for optical audio, component jacks, and speaker terminals. Speaker binding posts are easy to reverse, and a clear photo of which wire went to the red or black post saves you from phase problems later.
For anything color-coded or numbered, get close enough to read it. These connection shots turn reassembly from guesswork into simple matching. When the photo shows exactly what plugged in where, there is nothing left to figure out.
Naming and Organizing Your Photos
A folder full of 30 unnamed photos is almost as bad as no photos. Spend two minutes organizing them right after the teardown. Create one folder named for the setup, like "Living Room Home Theater 2024."
Inside, a simple file-naming pattern helps. Something like "01-wide-room," "02-tv-back," "03-receiver-back," and "04-speaker-terminals" keeps them in logical order. Photo organization this basic still beats scrolling through a camera roll a year later.
If you tore down more than one room, keep each in its own folder. The goal is to open the folder and instantly understand the sequence. Clear file naming turns a pile of images into a real instruction manual.
Backing Up Your Teardown Record
Phones get lost, dropped, and replaced during moves. If the only copy of the teardown photos lives on one device, one bad moment erases the whole record. Back it up.
Upload the folder to cloud backup like Google Photos, iCloud, or Dropbox right away. That way the documentation survives even if the phone does not. It also lets you pull the photos up on a laptop during reassembly, which is easier than squinting at a small screen.
For extra insurance, print the most important shots and drop them in the box with the gear. A printed sheet of the receiver's back panel taped inside the lid means the answer is right there, no device needed. Redundant documentation is cheap peace against a lost phone.
Cable Management for Long-Term Storage
Cables are where storage plans fall apart. Everyone dreads opening the bin months later to find a tangled knot of black cords with no idea what is what. A little cable management up front prevents that entirely.
The goal is threefold: label every cable, coil it without damage, and store it apart from heavy gear. Done together, these steps keep cables usable and matched to your teardown photos.
Labeling Cables So Nothing Gets Mystery-Boxed
The moment a cable comes loose, it needs a label. A small flag of masking tape wrapped near the connector, written on with a marker, does the job. Note what it connected, like "TV to Receiver HDMI" or "Left Front Speaker."
Colored ties or colored tape add another layer. Assign a color to each device or zone so a quick glance sorts them. Matching those cable labels to your teardown photos closes the loop, since the photo shows where the labeled cable belongs.
Printed adhesive labels last longer than pen on tape if the gear is going into long storage. Whatever method you pick, be consistent. A cable with a clear label never becomes a mystery cord in a bin.
Coiling Cables Without Damaging Them
How a cable is coiled decides whether it survives storage in good shape. The over-under method, used by every stage and studio crew, coils without adding twist. You alternate a normal loop with a reversed loop so the cable lies flat and does not fight itself.
Tight bends are the enemy. HDMI and fiber optic cables have delicate conductors inside, and a hard kink can crack them permanently. Keep loops loose, at least the diameter of a small plate, and never cinch a zip tie down hard on the bend.
Secure each coil with a hook-and-loop strap rather than a tight zip tie. That protects the jacket and lets you unwrap it cleanly later. A well-coiled cable comes out ready to use, not crimped and unreliable.
Storing Cables Separate From Heavy Gear
Cables should never end up crushed under a subwoofer. The weight of heavy gear presses connectors against each other and can bend pins or crack housings over months in storage. Give cables their own space.
A single labeled bin for all cables and cords works well. Keep it separate from the boxes holding speakers, receivers, and the TV. That way nothing heavy sits on top, and the storage layout stays organized.
Group cables by room or device inside the bin using freezer bags. A bag marked "Home Theater Cables" keeps the set together and easy to grab. When it is time to rebuild, the whole cable kit is in one place instead of scattered across boxes.
Protecting Connector Ends and Adapters
The ends of cables take the most abuse in transit. Bent HDMI pins or a cracked optical tip make a cable useless. Port caps, the little plastic covers that ship with new gear, protect exposed connectors, and cheap ones are easy to buy.
Small adapters and dongles get lost fastest. Bag them together in a labeled zip bag so they do not vanish into the bottom of a box. Note which device each adapter belongs to right on the bag.
For loose cable ends, tuck them into the center of their coil rather than letting them stick out. That keeps connectors from catching or bending during the move. A few minutes of connector protection saves the frustration of a dead cable on setup day.
Packing TVs, Receivers, and Speakers the Right Way
The big pieces need the most care. A flat-screen TV, a heavy receiver, and floor speakers are the items most likely to get damaged and the most expensive to replace. Here is how to pack each one and the mistakes to avoid.
| Item | Best Packing | Common Mistake |
|---|---|---|
| Flat-screen TV | Original box or TV-specific carton, stored upright | Laying it flat |
| AV receiver | Boxed with vents clear, knobs protected | Packing material inside vents |
| Speakers / subwoofer | Grilles on, cones padded, stacked light-on-heavy | Stacking heavy items on cones |
| Small gear | Bagged with remotes, batteries removed | Losing cables and remotes |
Flat-Screen TVs and Original Boxes
The original box is the best protection a TV can get. The molded foam inside was engineered for that exact panel, holding it away from impact on every side. If you still have it, use it.
No original box? A TV-specific moving carton with foam corner blocks is the next best option. Our team handles this often through our packing and crating services, using padded cartons built for flat panels. Wrap the screen in a soft moving blanket first, never bubble wrap directly against the display.
The one rule nobody should break: never lay a flat-screen TV flat. The panel has no support against gravity in that position, and the glass can crack under its own weight or the slightest pressure. Always store and transport it standing upright, like a book on a shelf.
AV Receivers and Amplifiers
Receivers and amplifiers are dense and heavy for their size. That weight makes them prone to shifting inside a box and crushing lighter items nearby. Pack them in a sturdy box with firm padding all around so they cannot move.
Protruding knobs and dials snap off easily. Pad around the front panel so nothing presses directly on a volume knob or input selector. If knobs pull off, remove and bag them separately.
One thing to avoid: never stuff packing paper or foam into the vents. Those slots let heat escape during normal use, and jamming material in can bend internal fins or leave debris behind. Keep the vents clear and cushion the outside instead.
Speakers, Subwoofers, and Cone Protection
Speaker cones are fragile. A poke to an exposed cone can dent or tear it, and that changes the sound forever. Keep the grilles on during storage, and if a speaker has no grille, cushion the front carefully.
Subwoofers are heavy and often have a large exposed driver. Face those drivers toward each other or toward a padded surface so nothing presses on the cone. Wrap the whole speaker in a moving blanket for a soft outer layer.
Stack smart. Heavy speakers go on the bottom, lighter ones on top, and never let a hard edge rest against a cone or dome tweeter. Our specialty moving team treats large speaker systems the same way we treat other delicate gear, with dedicated padding and careful placement.
Small Gear: Consoles, Streaming Boxes, and Remotes
Game consoles, streaming boxes, and remotes are easy to lose track of. The first step is removing batteries from every remote and controller. Batteries left inside for months can leak and corrode the contacts, killing the device.
Bag each remote with the device it controls. A streaming box and its remote in the same labeled bag means they never get separated. The same goes for controllers, power bricks, and the little cables each device needs.
Consoles with hard drives deserve climate-controlled space, since heat and humidity are hard on the drive. Keep discs out of the console and store them separately. Small parts vanish fast during a move, so labeling and bagging everything up front pays off later.
Need Help in Los Angeles?
Popeye Moving & Storage serves Los Angeles and all of Los Angeles County.
Loading and Transporting Electronics Across LA Traffic
The move itself is its own risk. Between a hot parked truck, rough streets, and shifting furniture, electronics can take damage even after they are packed perfectly. Getting them across the city safely takes a plan.
Electronics transport comes down to three things: where the gear rides, keeping it cool, and cushioning it against vibration. Here is how our team handles moving day for AV gear.
Where Electronics Go in the Truck
Electronics load last and come off first. Loading them last keeps them near the door, away from the crush of heavy furniture, and makes them easy to unload before anything shifts. Position matters more than people think.
Keep gear off the truck floor. Road vibration travels straight up through the floor, so electronics ride better strapped against a padded wall or on top of a stable, cushioned layer. Never let a dresser or table slide toward a boxed TV.
Secure everything so it cannot move during a hard stop. LA traffic means sudden braking, and an unsecured box becomes a projectile. Proper truck loading and placement keep the fragile pieces stable from pickup to drop-off.
Avoiding Heat on Long Freeway Runs
A parked moving truck heats up fast. On a warm day, the cargo area can hit oven-like temperatures within an hour, which is rough on batteries and drives. Long runs on the 405 or the 101 with stops in between give heat time to build.
Timing helps. Moving during cooler morning hours keeps interior temperatures down, especially in summer. If the schedule allows, we plan longer hauls to avoid the hottest part of a Valley afternoon.
Minimize how long gear sits in a stationary truck. Loading, driving, and unloading in one smooth run limits heat exposure far better than leaving a packed truck baking in a lot. For sensitive electronics, every hour of parked-truck heat is a risk worth avoiding.
Rough Roads and Vibration in Older Neighborhoods
Some of the bumpiest streets in the city run through older neighborhoods. The roads near Highland Park and Echo Park have their share of cracks, patches, and uneven pavement. Every bump sends vibration into the cargo.
Vibration loosens connections and can stress solder joints inside gear over a long enough haul. The fix is cushioning. Boxes packed with firm padding on all sides absorb the shocks that a loosely packed box passes straight to the electronics.
We route around the worst stretches when we can and slow down over rough patches. Combined with good padding, that keeps vibration from doing quiet damage. A smooth ride is part of protecting gear, not just an afterthought.
How Our Team Handles AV Gear on Move Day
At Popeye Moving & Storage Co., we treat electronics as their own category, not just more boxes. Our crews load gear last, secure it off the floor, and keep it padded against vibration through every neighborhood. We track the electronics separately so nothing gets buried or misplaced.
We work every corner of the city, from the westside to the Valley, and we know which routes and streets treat cargo gently. That local knowledge shapes how we plan a move, right down to timing around heat and traffic. Whether it is a home theater or a full local residential move, the fragile gear gets dedicated attention.
Our professional movers also connect the packing and storage sides. Gear that we pack with the photo-first method and store in climate control comes out ready to set up. That end-to-end care is what keeps expensive AV systems working after a move.
Setting Up Again: From Storage Back to Your Living Room
Pulling gear out of storage is the reward for doing the prep right. With a clear teardown record and well-packed components, reassembly goes fast. But there are a few steps that protect the gear during that final stretch.
Rushing the reconnection is where damage happens. A patient setup, working from your photos and testing as you go, gets the home theater running without surprises.
Letting Gear Reach Room Temperature First
Electronics coming out of a cool storage unit into a warm home need time to adjust. Powering on cold gear right away risks condensation forming on the internal parts. That moisture can short a board the instant electricity flows.
The fix is simple patience. Let each device sit unplugged in the room for a few hours before powering on, ideally overnight if the temperature gap was large. Bringing gear up to room temperature slowly lets any moisture evaporate safely.
This matters most for anything that was in a cold or damp unit. A TV, receiver, or console that acclimates first will power on cleanly. Skipping this step to save a few hours is not worth risking the hardware.
Reassembling Using Your Teardown Photos
Now the photo-first work pays off. Open the teardown folder and work backward through the shots, starting with the back-panel and connection close-ups. Match each labeled cable to the port it came from.
The reassembly photos remove all the guessing. HDMI 1 goes back to HDMI 1, the left speaker wire goes to the left post, and the whole stack rebuilds exactly as it was. Cable matching against the photos is faster and more accurate than memory ever could be.
If you printed the key shots, tape them nearby while you work. Follow the sequence, plug in one device at a time, and check it against the photo before moving on. A setup that took hours to figure out originally rebuilds in a fraction of the time.
Testing Each Component Before Full Setup
Resist the urge to plug everything in at once and hope. Test one component at a time. Connect the TV, power it on, and confirm it works before adding the receiver, then the speakers, then the source devices.
Testing in stages catches any storage damage early. If a speaker channel is silent or an input is dead, you know exactly which device or cable to check because you only changed one thing. Component testing turns troubleshooting into a quick, logical process.
Watch for the small stuff too. A remote that will not sync might just need fresh batteries, and a picture that flickers might mean a loose HDMI cable. Catching these one at a time beats untangling a whole non-working system.
Cleaning Dust and Refreshing Connections
Even well-stored gear picks up some dust. Before the setup goes live, give each piece a quick cleanup. A can of compressed air clears dust from vents and fans, and a dry microfiber cloth wipes down surfaces.
Reseat the connectors as you reconnect them. Push each HDMI and power cable in firmly, and make sure speaker wires sit snug in their posts. A connection that loosened during the move can cause dropouts that are easy to blame on the gear itself.
A quick dust cleanup and a check of every connector make the difference between a system that works and one that mostly works. Take the few extra minutes. The home theater setup that gets this final attention runs clean from the first movie night.
Need Help in Los Angeles?
Popeye Moving & Storage serves Los Angeles and all of Los Angeles County.
Final Thoughts
Storing electronics and AV gear well comes down to respecting how different they are from furniture. Control the moisture, manage the heat, keep the dust out, and document everything before you unplug a single cable.
The photo-first teardown and smart cable labeling turn reassembly from a headache into a simple matching game. Combined with proper packing and climate-controlled storage, these habits keep expensive gear working for years.
If a home theater or AV system needs packing, moving, or storage anywhere in Los Angeles, our team at Popeye Moving & Storage Co. handles it with the care it deserves. Reach out through our contact page or give us a call for a consultation, and we will help protect your gear from the first photo to the final setup.
Frequently Asked Questions
Can electronics be stored in a non-climate-controlled unit in LA?
For a short stint of a week or two in mild spring weather, a standard unit can work if the gear is sealed with desiccant. For anything longer, or any part of summer near the Valley, the heat and humidity make it risky. Circuit boards, batteries, and speaker cones all suffer in a non-climate unit. Climate-controlled space is the safer choice for AV gear.
How do I keep moisture away from my stored TV and speakers?
Use silica gel desiccant inside the boxes, roughly 40 to 50 grams per cubic foot for coastal conditions. Wrap gear in anti-static bags or vapor barriers rather than plain plastic that traps condensation. Store in a climate-controlled unit when possible. Add a small hygrometer or humidity indicator card so you can check the levels and swap the desiccant before moisture builds up.
What is a photo-first teardown and why does it matter?
A photo-first teardown means photographing your entire setup before unplugging anything. You shoot wide room shots, back panels, and close-ups of every port and cable. Months later during reassembly, those photos show exactly what plugged in where. It turns a confusing guessing game into simple matching and can cut reassembly from a full weekend down to an hour.
Should I remove batteries before storing electronics?
Yes. Remove batteries from remotes, controllers, and any small device before storage. Batteries left inside for months can leak corrosive fluid that ruins the metal contacts and kills the device. In heat, lithium cells can also swell, which is a safety concern. Bag the removed batteries separately and keep them with the device so nothing gets lost.
How long can electronics sit safely in storage?
In a climate-controlled unit with desiccant and proper packing, electronics can sit safely for a year or more. In a standard unit, safe time drops sharply, sometimes to just a few weeks in warm or humid months. Heat, humidity, dust, and batteries left inside all shorten that window. Monitoring humidity and refreshing desiccant extends how long gear stays healthy.
Do I need the original boxes to store my gear?
Original boxes are ideal because the molded foam was made for that exact device. If you have them, use them. If not, TV-specific moving cartons with foam corner blocks and moving blankets work well for flat panels, and sturdy boxes with firm padding protect receivers and speakers. The box matters less than making sure the gear cannot shift or take impact.
How should I coil and label my cables for storage?
Use the over-under coiling method so cables lie flat without twisting, and keep loops loose to avoid kinking HDMI or fiber cables. Secure each coil with a hook-and-loop strap, not a tight zip tie. Label every cable with tape or a printed tag noting what it connected, and match those labels to your teardown photos so reassembly is straightforward.
Why should I wait before powering on gear pulled from storage?
Gear coming from a cool unit into a warm room can form condensation on its internal parts. Powering on while that moisture is present can short a circuit board. Let each device sit unplugged and reach room temperature first, a few hours at minimum and overnight if the temperature gap was large. That patience protects the hardware from avoidable damage.
Does Popeye Moving & Storage Co. handle electronics during a move?
Yes. We treat electronics as their own category, loading them last, keeping them off the truck floor, and padding them against vibration through rough neighborhoods. We use the photo-first method and proper packing to protect gear, and we can store it in climate-controlled units between moves. Our team tracks electronics separately so nothing gets buried or misplaced on move day.
What areas of Los Angeles does Popeye Moving & Storage Co. serve?
We serve the greater Los Angeles area, from the westside communities like Santa Monica, Venice, and Culver City to the San Fernando Valley, Downtown LA, and the beach cities. We also cover Pasadena, Burbank, Malibu, and the surrounding neighborhoods. Wherever the move takes you across the city, our crews know the routes and streets that keep fragile gear safe.
Frequently Asked Questions
- Can electronics be stored in a non-climate-controlled unit in LA?
- For a short stint of a week or two in mild spring weather, a standard unit can work if the gear is sealed with desiccant. For anything longer, or any part of summer near the Valley, the heat and humidity make it risky. Circuit boards, batteries, and speaker cones all suffer in a non-climate unit. Climate-controlled space is the safer choice for AV gear.
- How do I keep moisture away from my stored TV and speakers?
- Use silica gel desiccant inside the boxes, roughly 40 to 50 grams per cubic foot for coastal conditions. Wrap gear in anti-static bags or vapor barriers rather than plain plastic that traps condensation. Store in a climate-controlled unit when possible. Add a small hygrometer or humidity indicator card so you can check the levels and swap the desiccant before moisture builds up.
- What is a photo-first teardown and why does it matter?
- A photo-first teardown means photographing your entire setup before unplugging anything. You shoot wide room shots, back panels, and close-ups of every port and cable. Months later during reassembly, those photos show exactly what plugged in where. It turns a confusing guessing game into simple matching and can cut reassembly from a full weekend down to an hour.
- Should I remove batteries before storing electronics?
- Yes. Remove batteries from remotes, controllers, and any small device before storage. Batteries left inside for months can leak corrosive fluid that ruins the metal contacts and kills the device. In heat, lithium cells can also swell, which is a safety concern. Bag the removed batteries separately and keep them with the device so nothing gets lost.
- How long can electronics sit safely in storage?
- In a climate-controlled unit with desiccant and proper packing, electronics can sit safely for a year or more. In a standard unit, safe time drops sharply, sometimes to just a few weeks in warm or humid months. Heat, humidity, dust, and batteries left inside all shorten that window. Monitoring humidity and refreshing desiccant extends how long gear stays healthy.
- Do I need the original boxes to store my gear?
- Original boxes are ideal because the molded foam was made for that exact device. If you have them, use them. If not, TV-specific moving cartons with foam corner blocks and moving blankets work well for flat panels, and sturdy boxes with firm padding protect receivers and speakers. The box matters less than making sure the gear cannot shift or take impact.
- How should I coil and label my cables for storage?
- Use the over-under coiling method so cables lie flat without twisting, and keep loops loose to avoid kinking HDMI or fiber cables. Secure each coil with a hook-and-loop strap, not a tight zip tie. Label every cable with tape or a printed tag noting what it connected, and match those labels to your teardown photos so reassembly is straightforward.
- Why should I wait before powering on gear pulled from storage?
- Gear coming from a cool unit into a warm room can form condensation on its internal parts. Powering on while that moisture is present can short a circuit board. Let each device sit unplugged and reach room temperature first, a few hours at minimum and overnight if the temperature gap was large. That patience protects the hardware from avoidable damage.
- Does Popeye Moving & Storage Co. handle electronics during a move?
- Yes. We treat electronics as their own category, loading them last, keeping them off the truck floor, and padding them against vibration through rough neighborhoods. We use the photo-first method and proper packing to protect gear, and we can store it in climate-controlled units between moves. Our team tracks electronics separately so nothing gets buried or misplaced on move day.
- What areas of Los Angeles does Popeye Moving & Storage Co. serve?
- We serve the greater Los Angeles area, from the westside communities like Santa Monica, Venice, and Culver City to the San Fernando Valley, Downtown LA, and the beach cities. We also cover Pasadena, Burbank, Malibu, and the surrounding neighborhoods. Wherever the move takes you across the city, our crews know the routes and streets that keep fragile gear safe.
P
Popeye Moving & Storage Co. Team Team
Licensed moving and storage professionals serving Los Angeles and Los Angeles County.
Licensed in California · License #PUC: CAL T 189749 | DOT: 1472924 | MC: 498816C
Why trust Popeye Moving & Storage?
Founded in 1994, Popeye Moving & Storage is a licensed and insured moving and storage service serving Los Angeles and Los Angeles County. All content is reviewed by our licensed technicians.

Need Help in Los Angeles?
Popeye Moving & Storage serves Los Angeles and all of Los Angeles County.
Related Articles
How-To Guides
Office Furniture Storage Between Leases: Decommission Today, Refurnish the Next Space Later
Learn how LA businesses store office furniture between leases, decommission the old space, and refurnish later - with costs, timing, and expert tips from Popeye Moving.
How-To Guides
Storage During a Probate-Free Estate Cleanout: The Sort-Later Strategy That Unblocks a Sale
How the sort-later storage method clears a probate-free estate home fast in Los Angeles, unblocking a quicker sale while families sort belongings on their own time.
How-To Guides
Accessing Your Things in Vaulted Storage: How Appointment Retrieval Works and the Honest Trade-Off vs 24/7 Units
How appointment retrieval works for vaulted storage in Los Angeles, plus an honest comparison against 24/7 drive-up units on access, cost, and protection.